Cauliflower Crust Pizza
When the airport shuttle driver found out I write about food, she slowed down. I was OK with that, because I was going home, with no more planes to catch and nothing but shower and bed on my schedule. But suddenly I was wide awake, because the airport shuttle driver was telling me about cauliflower pizza crust.
She began making it for her gluten-free son, she said. He wasn't sensitive to gluten, but he liked the GF diet because it was low-carb, and he wanted to lose weight. The only problem, she said, was he couldn't stop eating this cauliflower pizza crust. At first I thought this recipe was our little secret, but the bloggers have been all over it for years, as it caters to every flavor of low-carb diet you could imagine. It's paleo, keto, gluten-free, and even Atkins, for the old school crowd.
A Google search of the phrase "cauliflower pizza crust" returned 961,000 hits. Each and every one that I clicked delivered a nearly identical recipe. While there are minor twists and variations, they all include cauliflower, cheese and egg, and little else. And they all have a step to remove water from the shredded or pureed cauliflower, in order to have a dry batter to work with.
Sadly, none of the recipes I examined seemed to know or credit inventor, Jamie VanEaton, who published the first cauliflower pizza crust recipe in 2012, on her site YourLighterSide.com, who I found after a little digging. Of the near-million uses of her recipe, only 261 give her credit. Having made the crust about 15 times, in as many different ways, before I found VanEaton's original, I can see that hers is one of the best. I like to think my version offers a few improvements - what cook doesn't think this all the time?
The recipe's major issue is whether or not to cook the cauliflower before making the dough. VanEaton does, but many people don't. Based on a side-by side comparison, it's clear that steaming the cauliflower first creates the fluffiest, puffiest, creamiest crust of all. This means the cauliflower will be cooked three times before the eventual pizza is done, but it's totally worth it. Whether or not you care about avoiding carbs, gluten or anything else related to pizza dough, this crust will make you happy. And if you are a bread-starved pizza lover on a low-carb diet, it could be your salvation.
Cauliflower Crust Pizza
This recipe can be cut in half, for a seven-inch crust. But given the amount of work, I think it makes sense to make a larger batch - for either two small or one large crust. You can freeze a baked crust if it gets to that. I doubt it will.
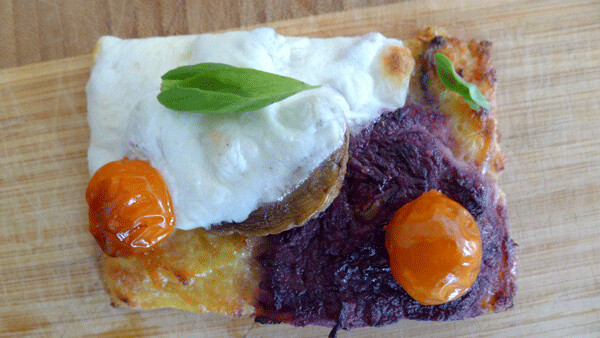
For fun, I've played around with purple and yellow shades of cauliflower. Purple makes a beautiful, delicious crust, while yellow cauliflower crust is noticeably bitter.
Serves 4
Crust 1 large head of cauliflower (2 lbs trimmed florets)
2 eggs 2 teaspoons fresh oregano or thyme
1 cup shredded Italian 4-cheese blend (Parmesan, Romano, mozzarella, Provolone)
2 tablespoons olive oil
1 teaspoon salt 1 clove garlic
Toppings
Mozzarella cheese
Fresh tomato or tomato sauce Mushrooms Pepperoni or sausage slices Fresh basil for garnish Barbeque Sauce, Brie, figs, peppers, roasted garlic - be creative; it's pizza!
Special tools/supplies
Strainer Parchment paper Cut the cauliflower into florets, and trim the stems in close, so the cauliflower is basically all florets. Cut or break them to pieces no longer than 2 inches in any dimension. Steam the florets, along with the garlic, until tender, about 15 minutes. When cool enough to handle, transfer the florets and garlic to a blender with the salt, along with the salt. Blend on low, adding water, a tablespoon at a time, as necessary so it blends into a smooth vortex. Slowly increase the speed to high, and whip that cauliflower into a cloudlike mound of foam.
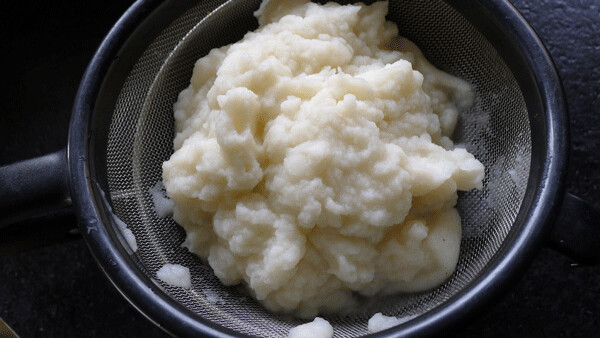
Gently pour the foam into a strainer. Some will squeeze through the screen when you first pour it, but the cauliflower will quickly set up and steadily drain under its own weight. Give it a gentle stir once or twice, lifting from the bottom rather than pressing down into the screen. Wait for up to an hour, until the draining stops. Overnight in the fridge is best.
Add the strained puree to a mixing bowl, along with the eggs, oregano or thyme and cheese blend. Use your hands to combine and mix the batter. Lay a section of parchment paper on a baking dish or sheet. Spread the olive oil atop the parchment paper, then place the batter in the middle of the sheet. Use your hands to shape it into a circle, rectangle or whatever you wish. Keep the thickness even throughout the crust - don't let it peter out at the edge. A finished disc with this amount of batter should be about ½-inch tall and 9 or 10 inches across. Leave at least 2 inches of empty space around the edge. Place the pan in the cold oven, and turn the temperature to 400 degrees. Begin checking on the crust about 20 minutes after the oven reaches full heat. Depending on the thickness, and how well it drained, and the exact type of cheese you use, it should take 30 to 45 minutes to bake.
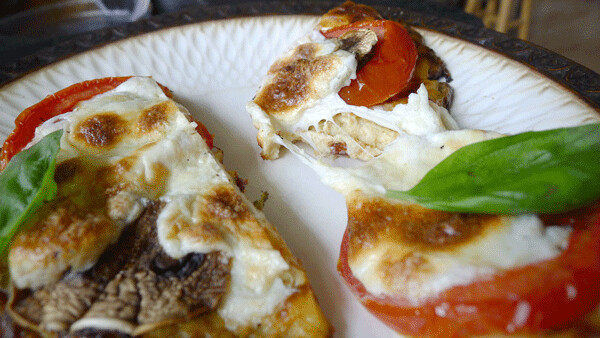
When nicely browned on top, and before the edges burn, remove from the oven and allow to cool completely. It's now ready to top and re-bake. Top it however you see fit. If the edges of the crust are blackened or blackish after the first bake, cover with pieces of foil to keep them from getting darker. Put the pizza in a pre-heated oven at 400, and bake until the cheese melts and pepperoni browns, about 15 minutes. Remove, slice, and serve hot.